Showing posts with label Creative. Show all posts

Thursday, February 26, 2015

Never need a reason...Step in time - Step Stools

Decorating Children's Step Stools

 I have several grandchildren of the short variety who needed step stools.  It seemed like a fun birthday present.  Not being handy with wood working and terrified of all cutting power tools, I took myself to Michaels to see if they had ready-made step stools.  Fortunately they had just the right size plain wooden stools screaming to be painted, decorated, and fancied up.  Interestingly, they all had warning stickers "for decorative purposes only".  My intentions were to decorate them and then actually use them - so I considered myself warned.

Feeling a bit lazy, I wandered up and down a few isles looking at wooden letters, shapes, cut-outs of animals, toys, stencils looking for ideas.  There were some really snazzy primary colored wooden letters and also some letter stickers. I purchased the letters and some wooden cut-outs.

First step was to lightly sand the rough patches, then paint each stool.  The wood was unfinished so it needed primer. Turned out the primer was visiting neighbors or getting it's hair done or something - couldn't find it anywhere.  I choose to use additional coats of paint rather than going out to get primer.  One stool was painted brown and the other white.

After painting I used glue to attach the cut-outs and letters.  One the white stool I taped off stripes with masking tape and then used a dauber to make polka dots on the top  On the other stool, I modge-podged stickers to add a little traction to the top and made polka dots around the edge.

Each stool received a couple of coats of poly sealer and voila!


Here's the other one with an eager little foot getting ready to hop on.  I didn't get a picture of the top but it's decorated with star stickers in a swirl pattern.


Tuesday, January 21, 2014

Rocking and Rolling - Chair Slip Cover

Slip Cover Adventures


It's been a while since I've posted anything but I have a good excuse - I've been having an adventure.  Not a white water river rafting adventure or a trek across Thailand, but an adventure none the less.  I have this not so attractive swivel chair in my living room.  I got it for a good price from my local furniture consignment store, not wanting to invest in a new chair until my fuzzy friends were no longer ruling this roost.  Here's a picture of the chair:

Kind of a weird perspective but you can see it's a dull colored plush sort of fabric.  The chair itself is really comfortable and it swivels. The swivel is crucial because if the chair is turned around like you see in the picture, the ferrets climb up the chair, stand on the back and jump across the space to the table behind.  From the table they can get crawl through the railing and get upstairs.  Getting upstairs is one of their life goals so any time an opportunity presents itself they take full advantage. Here is how the chair usually looks:


Because the chair is used as a ladder, it is full of pulled threads.  Not so attractive.  I thought about reupholstering the chair but decided against it because a) nice fabric is expensive, b) the ferrets would still climb on it and wreck the new fabric, and c) I have no idea how to do it.

But - the chair was driving me crazy, dull and unattractive and getting worse by the second, kind of like your hair once you realize it's past time to get it cut.  Maybe I could make a slip cover for it. I took a quick trip to my local Joann Fabrics and headed straight to the piles of "discount fabrics".   I found a bolt with 8.3 yards left, actually called "outdoor" fabric in colors that I thought would work.  It was very tightly woven and sort of slippery - maybe it would prove impossible for the ferrets to climb the chair!  Anyways, it was $9/yard, kind of pricey to experiment with.  I say "experiment" because I had never sewn a slip cover and had no idea how many yards of fabric I needed. I put the fabric back and then noticed that all of the discount fabric was 50% off .  Grabbing it back, I headed to the cutting counter trying to figure out how much to buy since I had not actually measured the chair (note to self for next time).  Since the remainder of the bolt was about $36 I just bought the whole thing figuring that the rest of it could be used for something....which is probably the reason I have filled up a couple of closets with fabric.

Spoiler alert:  If you want actual directions to making a slip cover, stop reading now and head for the Internet.

How to begin - start with Pinterest of course where lots of kind folk had posted tutorials on making slip covers, videos, pictures, etc. Several suggested using cheap fabric like old sheets to make a pattern, playing around until you get it right and then using this to cut out the nice fabric.  Probably a wise way to go but being the impatient sort I just started fitting it onto the chair, beginning with the cushion and tracing around each part with a black marker on the wrong side of the fabric.  If you take this approach make sure you have a fine marker that does not bleed through and show on the right side.


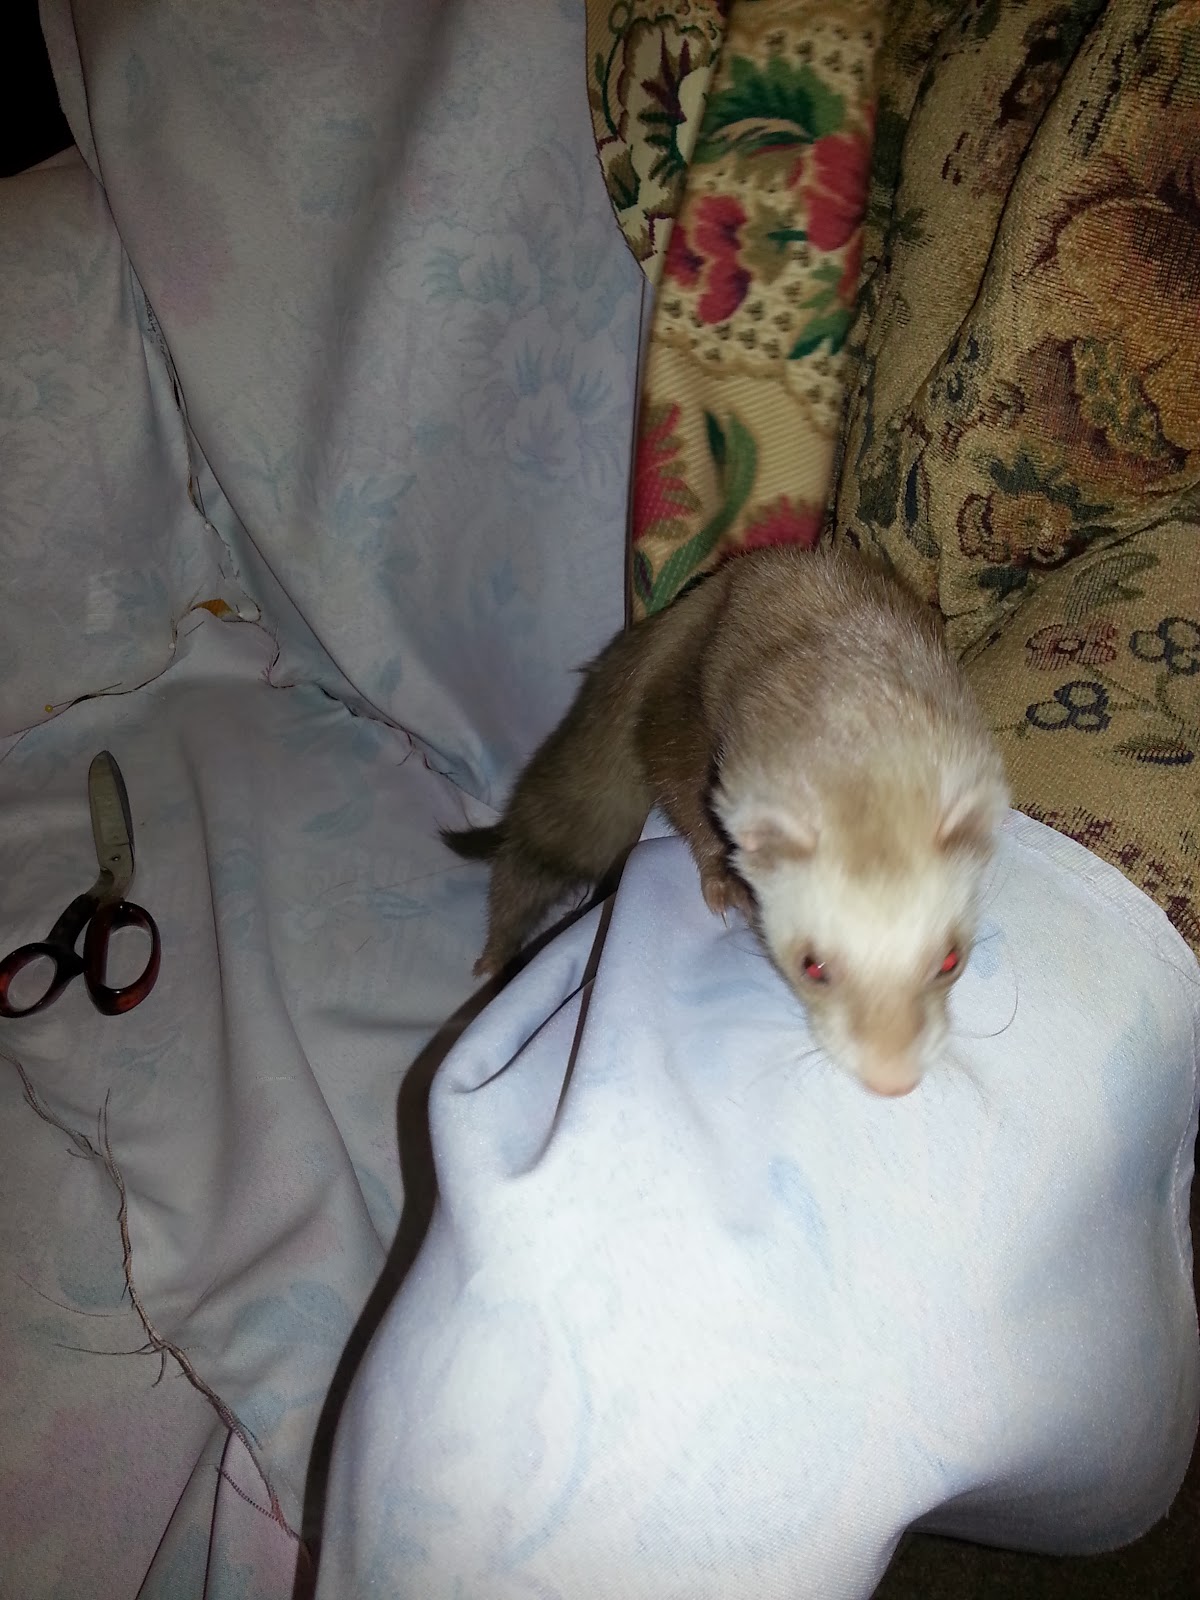
Penny is a great help - crawling under the fabric I am trying to pin.  You can see a part of the arm, bottom and back of the chair being pinned together wrong side out.  Slick trick but hard on the brain to do it all in what seems like reverse.


Penny is lucky she didn't get pinned into the project!  The first part finished was the chair cushion.  It was the easiest since you could actually lay the fabric on the cushion and trace around it.  I also bought white cording to make the piping around the cushion and the top of the chair. It was easy to make: cut a strip about 1.5 inches wide, fold in half with the cording in the middle (wrong sides together) and sew as close as possible to the cording.  The piece(s) should be cut on the bias and stitched together into the lengths you need.  This keeps the fabric from stretching out of shape when you sew it.  Since my fabric had absolutely no stretch and I'm sort of lazy as I mentioned before, I cut a straight strip along the edge of the fabric.  Here's the finished cushion:


The rest of the slip cover was like a big puzzle.  I measured each section of the chair - arms, bottom, sides, back, traced around where I could and cut out over-sized pieces.  These pieces were fit together, pinned and then sewed one seam at a time.  After each seam I would put the cover back on, still inside out and make adjustments, re-pin and then sew the next seam.  It was a long process and sometimes I would pin it, go over to the sewing machine to sew and couldn't figure out why I had pinned it that way.  Back I would go to the chair, re-pin again, back to the sewing machine, etc.  I think I pinned one of the arms where 4 pieces come together about 5 times, just couldn't wrap my brain around it.

It was easiest to sew the piping to one of the pieces and then pin them together.  I could not just pin it in between the pieces because the fabric was slippery.  I finished each seam because it unraveled easily and I wanted to be able to wash the cover without it falling apart.The entire slip cover project probably took about 20 hours.Here's the final product and I must say that I am really happy with it, especially since it's my first attempt.


The only bad news - it's not too slippery for the ferrets to climb.  I guess I will mostly be looking at the back of the chair just like before.


Tuesday, January 7, 2014

How to Train Your Birthday Party

Choo choo Logan's two..

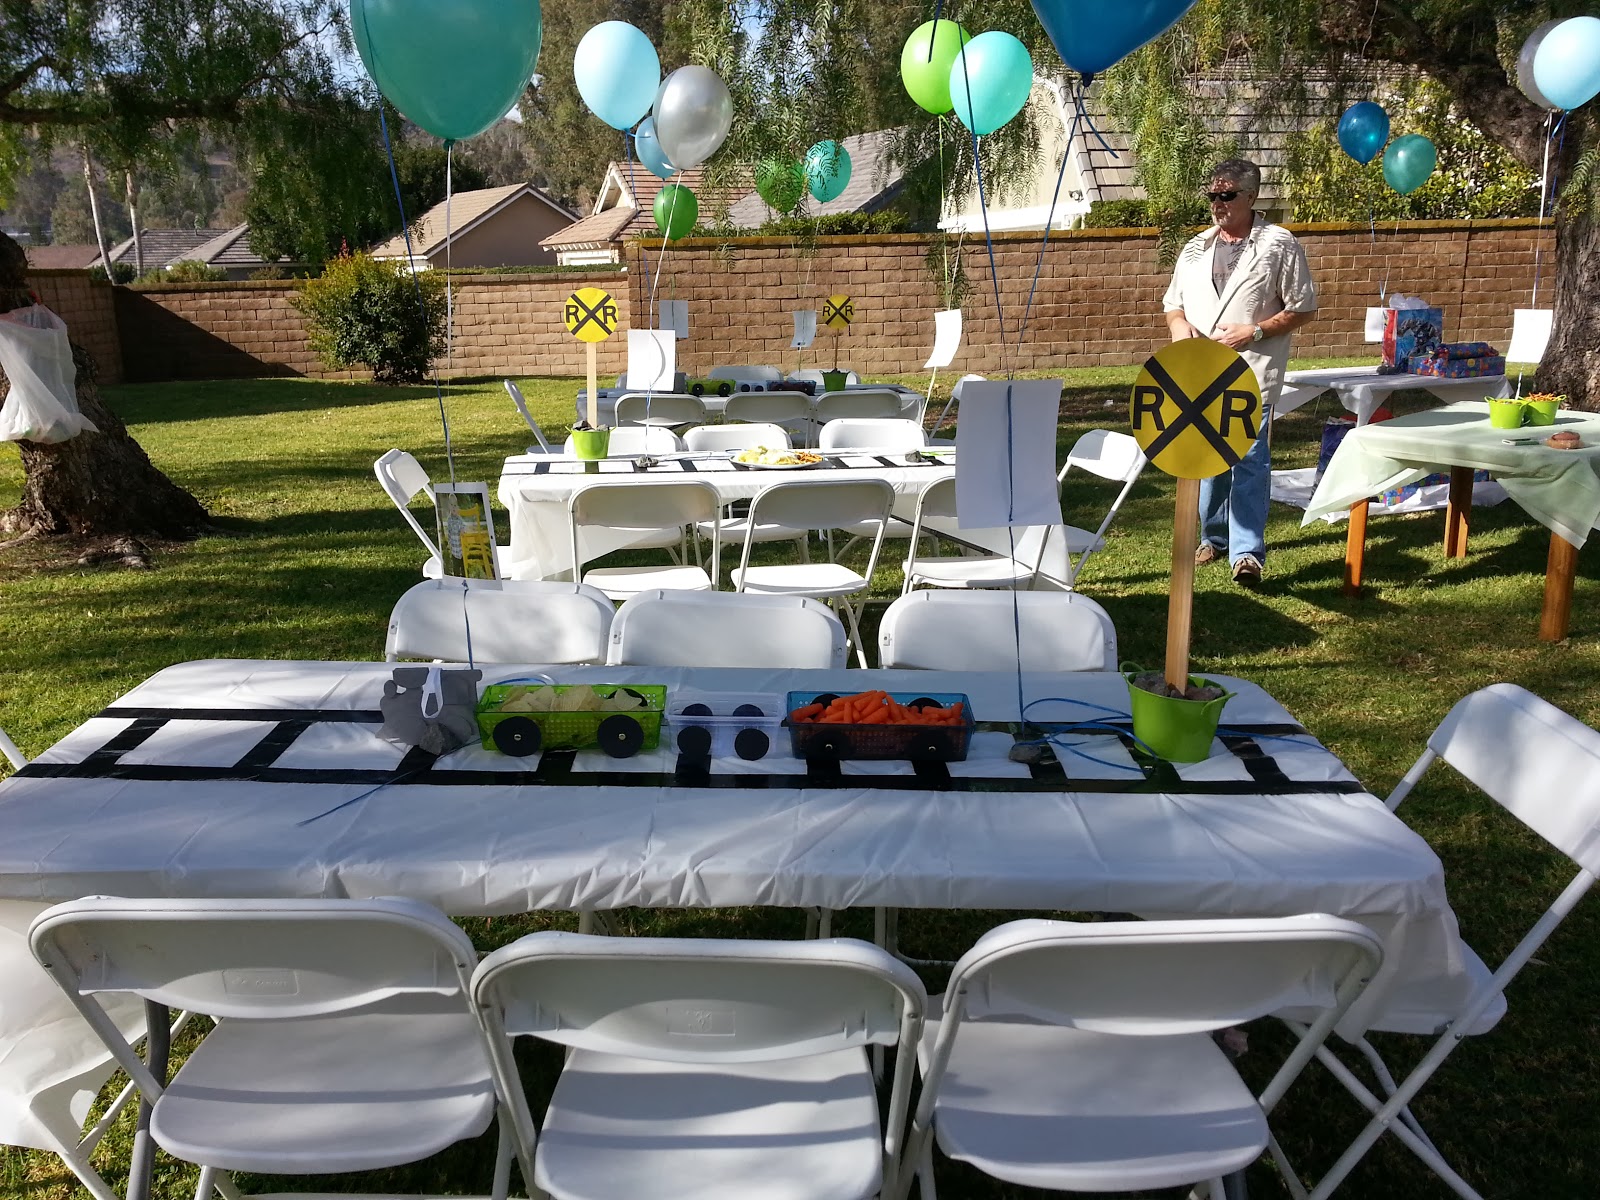
My youngest grandson turned two on Christmas Day and had a train birthday party last Saturday.  My daughter and I had so much fun getting every thing ready.  She's very creative and of course Pinterest provided some great ideas.  Most of the decorations were made with items bought from the dollar store.  Here's what she came up with:

*White table plastic table cloths with black duct tape railroad tracks


*Bright green metal pails with yellow railroad crossing signs hot-glued to sticks (paint stir sticks work well) and filled with rocks that were "borrowed" from along side the railroad tracks.  The rocks keep the signs up and were returned after the party.


* Duct tape railroad tracks on the sidewalk leading up to the house
* White railroad crossing signs on stakes for the entrance to the party and next to the food table

* "Train" cars made out of green and blue plastic containers with wheels glued on for the chips and carrots with clear containers, again with glue on wheels for the dip. At the front of each train there was a wood locomotive wood cut-out ($1) painted gray. This completed the train.

* Goodie bags were green plastic containers with wheels glued on. They contained a wooden train whistle, one of the wood train cut-outs to paint, a balloon punch ball and a locomotive made with candy.


* On the food table she used a toy wooden train as a centerpiece
* Pictures of Logan from the prior year were blown-up into 5x7 size, hole-punched an strung on the ribbons attached to the helium balloons.  Some of the borrowed rocks were tied to the ribbons so the balloons did not float away.  She put these on all of the tables.


* A train made from cardboard boxes that were spray painted and taped together - this was for the kids to crawl through (little kids)
* Cake that Grandma made - that's me.  It's included in the pictures below.


I baked the cake in a 16x16 square pan that takes 3 cake mixes.  Then I baked another regular size sheet cake and cut the "2" out of this cake.  I put the "2" on top of the square cake. Each cake was frosted with colored vanilla flavored frosting.  The green color was changed by adding one can of white and a lot of yellow food coloring to make it a bright lime green (it's kind of a Christmas green in the can), The sprinkles came with the green frosting.  I piped white around the edges and embedded green, yellow, blue and brown m&m's along the edge.  The railroad track is hershey's candy bar pieces and the "rails" are black frosting that you can buy in a tube. We printed the birthday sign, glued it to foam board and used paper straws for the posts.  The final touch was one of Logan's wood engines set on top of the tracks. Total cost was about $20 with lots of candy left.  And - it tasted good! 


Tuesday, December 31, 2013

Let Your Light Shine - Ikea Chandelier hack

 What can you do with a swag hook?


There was a dark corner in the bedroom that called out for a some kind of light. Since the prior owner had already screwed a swag hook into the ceiling, it seemed right to hang a small chandelier. So I started looking and found all sorts of beautiful chandeliers that would have been perfect except for either the price (I am a bit of a cheapskate) or the need to be hard-wired.  I wanted a light that could be swagged with the cord running down the wall behind the curtain and then plugged into the outlet.  "Why not just hire an electrician and wire the ceiling?" asked a well-meaning friend.  Did I mention that I am somewhat of a cheapskate and an electrician was not in the budget.

Since I couldn't find anything suitable, my thoughts turned to finding something that could be added to or altered.  One challenge was the swag hook, it was screwed into the ceiling not into wood. I didn't want to move it and put another hole in the ceiling. The hook had a small anchor but I was not sure how much weight it could hold.  A crash in the night would probably give me a heart attack.

So, a friend and I decided an Ikea field trip was just what we needed.  Lots of great chandeliers - right price and right size but all the ones I liked needed to be hard wired.  Then I spotted a modern looking fixture.  It was lightweight, made of white plastic covered wire with small lights all the way around, great size and only $19.99. Biggest issue - my bedroom is not at all modern. My furniture is of the antique variety, flowered quilt, etc. so the modern looking chandelier just wouldn't fit.

Suddenly, a light bulb went on.  I could add flowers, beads and hang some old chandelier crystals around the edge.  Of course the packaging on the Ikea fixture said not to attach anything or alter it in any way.  But the lights were LED and not going to get hot, I wasn't messing with anything electrical so I decided to go for it.  Disclaimer - if you copy my chandelier, I take no responsibility for your house burning down.  

Here's the final project:


Close up view:


I wove some pink flower stems and gold & pink bead stems through the fixture and then placed the crystals around the edge. Originally I wanted to hang more crystals from the chandelier but since they are genuine crystal (saved from an old chandelier) they were pretty heavy.  In this case less had to be more.

This chandelier adds ambiance, just enough light to brighten the corner and fits in nicely with my romantic type decor.  It has an on and off switch, so to be safe I only have it on when I am in the room.  So far so good...

Monday, December 30, 2013

Just a Bird in a Guilded Cage - Jewelry Display

What can you do with a bird cage?

The obvious answer is keep your bird in it.  Don't have a bird?  Don't want a bird? Here's an idea:

A bird cage is a great way to display your jewelry.  My jewelry was in tiny zip lock bags and stashed in a large jewelry box with multiple drawers.  Everyday I would rifle through the various bags trying to find the pieces I wanted to wear. I couldn't remember what was in each drawer and if I pulled them out far enough to see inside the drawer would fall out.  Frustrating.

Helping a friend unpack, I got the job of putting away her jewelry which she displayed on a metal flower-shaped wall decoration.  Very cute and you could see all of the beautiful bracelets, necklaces, etc.  So now I was on a mission to find something similar for my house.  Off I went to Home Goods, one of my favorite field trips.  Of course, they had nothing similar so with my problem-solving hat on,  I went up and down every isle (somebody has to do it) trying to conjure up the perfect jewelry display item,  Several items made it into the basket and the same items went back on the shelf on the next trip around.

Then I saw a gorgeous standing bird cage and my creative juices started flowing.  How could I use it?  I loved that it stood on it's own, nothing to hang and it would take the space of the old jewelry box.  It was more money than I wanted to spend but I could see it looking beautiful in the bedroom and I was really tired of looking so it came home with me. 

The necklaces and earrings that closed I hung on the horizontal wires that ran around the outside.


For the bracelets, I cut two 1/2 wood dowels so that they were long enough to span the cage and glued some scrap black velvet on them. Voila - bracelet perches.  If you used a smaller diameter dowel you could have ring perches.


 View looking down from the top:


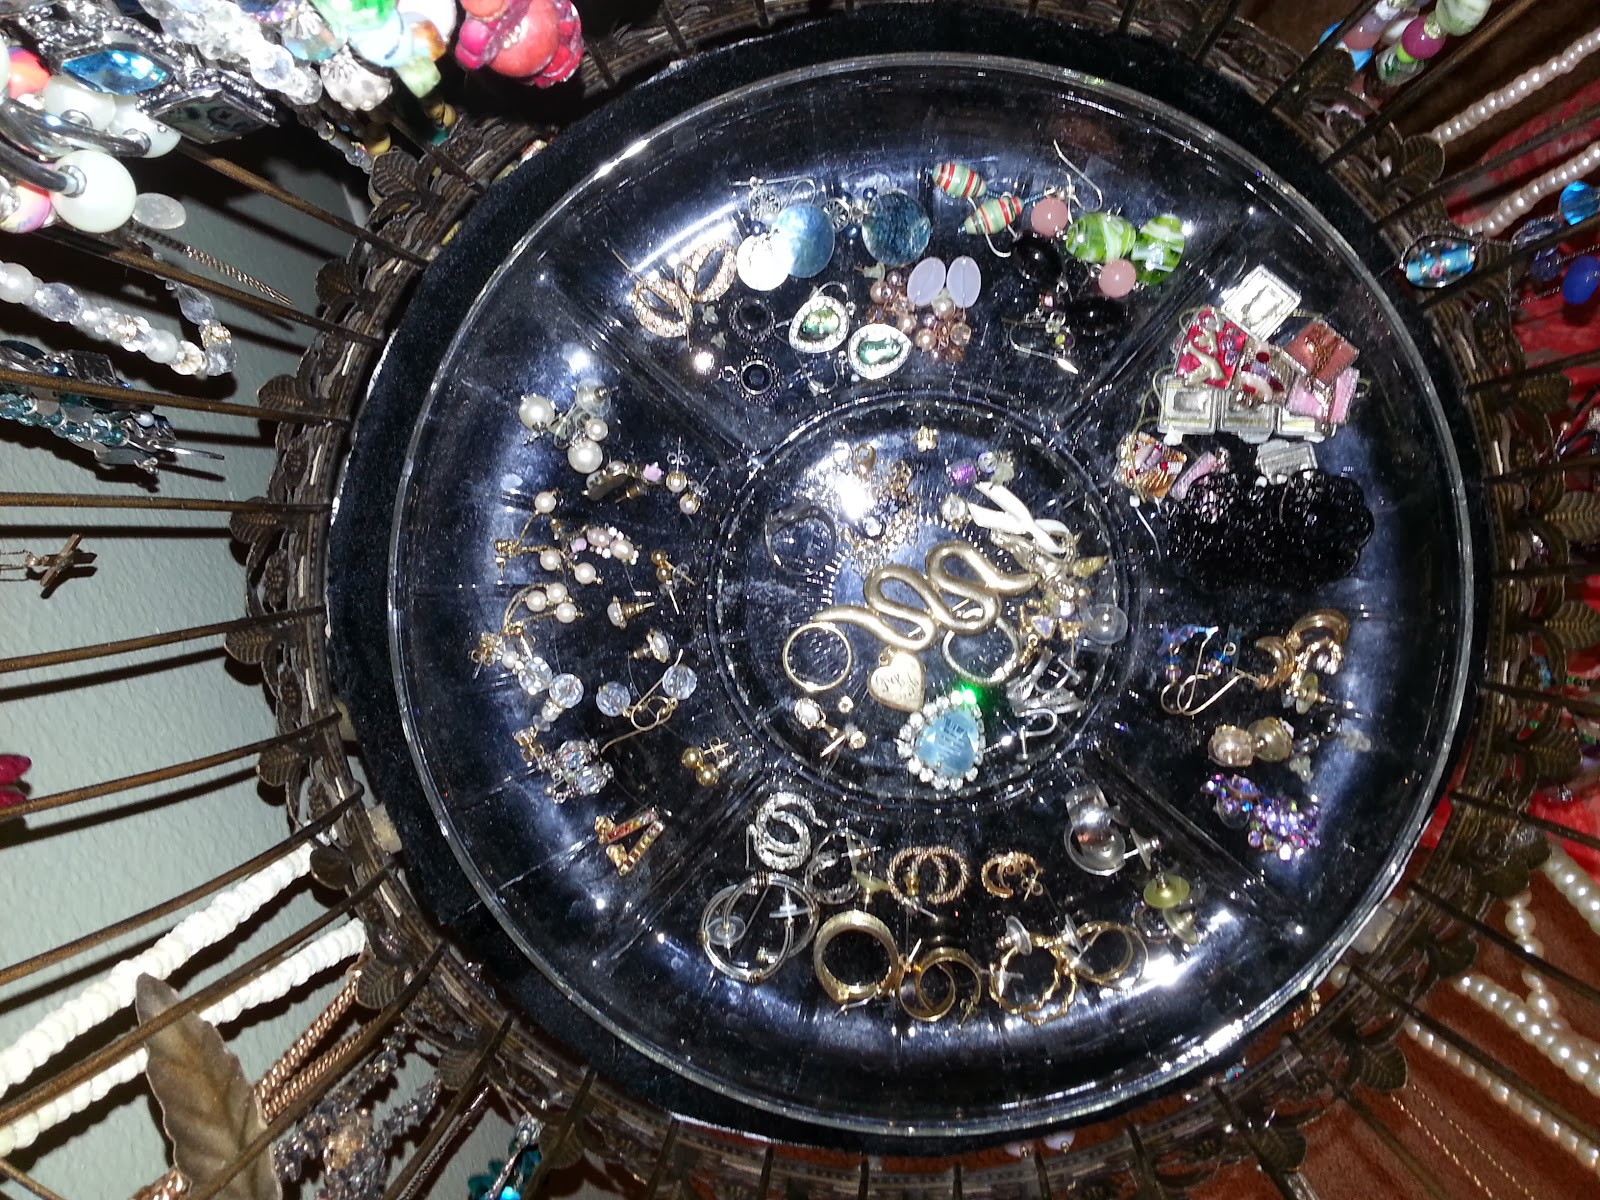
The bottom of the cage was wired and I was afraid things would fall through so I covered a circle of cardboard (actually 2 half circles to fit the diameter of the cage) in the same black velvet and put it in the bottom of the cage. Then I added a circular glass relish plate with dividers, the kind you put pickles and olives on.  This was the perfect place to put post earrings, pins, etc.

 View looking in through the cage bars:


Here's the finished product.  It looks great and I can see all the pretty jewelry, enjoying it every day even if I am not wearing it.


Although I purchased this metal decorative cage, with patience you could probably find one at a garage sale or thrift store or just turn out your bird and claim its cage!  Have fun.